July 16, 2021

Yay! A Real Life #Dollhouse #Miniatures Show!


(Photo: Me and Hubby talking about my purchases. Or, what happens when you spend a lot of $.  haa! From All About Miniatures. See more below.)

Oh, the wonder of actually getting out after over 1 1/2 years to see a real life dollhouse show!!

Just got back from the Chicago Spring Showcase dollhouse show at the Wyndham Garden Hotel in Schaumburg, Ill. This used to be run by Three Blind Mice and was previously held in April, though everything got pushed back later because of Covid.

So fun to look around again and pick up stuff and see what's new! 

Want to see what I got? Oh, sure you do!! (Click photos for full size.)

So... Love when I come across some new kits I haven't seen before, especially in half scale. I also got a few odds and ends not shown here like a couple teensy black plastic cats that I'll flock and paint, and some metal miniatures to paint.

Found quite a few interesting half scale kits from All About Miniatures. Greg, the owner, also said he plans to add more HS kits as he had quite a few different styles in quarter and 1" scale. (Update: He'll have a website up in a week or so, so be sure to check http://allaboutminiatures.com.  I'll check back to make sure I have the address right.)

I was glad to find this longer table kit (comes in maple and walnut) as I needed something to put in front of the balcony in the second floor hall in the Victorian-flavored HS dollhouse. (Scroll down or see archives list in left column for other posts and photos.) The chair kits were also kind of neat to add a 50's-60's flair to a room. 

And I couldn't pass up this unique kitchen cupboard kit (above) from Ron Chase at D-Tales Miniatures just for the different components. I'm sure I'll need cabinets in some project... I especially was interested in the dish drainer in the kit as I need one for the dollhouse kitchen! 

His filigree carved clocks are so incredible! Wish I'd taken some photos. Here's one of his clocks on top the shelving unit at the Miniature Whims blog. (See this carved wall clock on Otterine's blog, photos 1 and 2. I'll probably kick myself for not buying one. (I see he'll be at the Bishop Show in April so I'll plan on that!) Here's a couple of his carved items on another site.)  But we did get this really neat old-fashioned radio from his table. 


Also from All About Miniatures: I'll use the palm tree carving for my half scale beach house wall because sometimes I like using larger items for effect. It might even work as some kind of wall/room divider. The spooky cameo will work as a dollhouse wall plaque, too. The carved zebra was just kind of cool and different. Here's what the actual carvings look like, too.


And about the Skellie couple at the top of the blog... He also had a fun selection of dressed skeletons. Just love 'em! These are my titles:  :)

Gossip Girls:

The Three Stooges:


Before...


And After....


Thanks for stopping by again! Be sure to come back for other updates. You can also subscribe to the blog via the box in the left column or at the bottom of my website

Until next time!! --Chris


July 13, 2021

#HalfScale #Dollhouse Update: Furnishings & Rooms


Above: The house all lit up. Yes, it has lots of lights. (46 lights inside.)

I've been busy decorating here and there. I'm trying to get some good shots of the rooms, which is hard because of the smaller size and trying to figure out the right camera settings. I'll get it yet. (Scroll down to see previous posts or look in archives list on left. Click photos to enlarge.)

For now, thought I'd share some more things I've finished and other stuff I'm working on.

Attic: I'm hoping to get a deeper, full photo yet but this gives you an idea of the assortment of stuff in there so far. Fun finding things to put in. Yes, even that wringer washer back there. ha! (Which is a fridge magnet.) I love this space. I may do another attic in both scales as a way to store stuff instead of sticking things in boxes. It makes clutter fun! ha!


Front foyer: This is the inside of the tower space next to the sitting room/parlor. I wanted it to be a simple garden-like place with plants. I may add a few more plants yet, I think.


The front hall... just a glimpse. I added the dropleaf table (from the Mount Vernon collection) and the phone, plus a small picture. Seemed the perfect place to gab on the phone! The housemaid is cleaning up a spill.


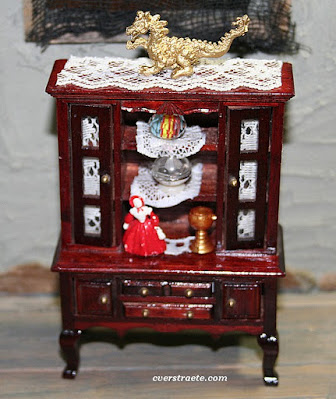
Dining room: Decorated this hutch for one side of the dining room.


Kitchen: I'm working on tile strips for above the counter. (There are three strips to cover part of the side wall and two on the back wall.) It will go behind the sink on the wall to fill in the gap. I like how the counter turned out. It'll look even better once it's filled with canisters, dishes, food, baked cakes, etc. 

The fridge/panty cabinet: The microwave is a perfect photo I found in a Grand Appliances flyer! (attached to a square of wood) The kitchen kits are from SDK Miniatures. The 'bumpy' surface on the background is a textured scrapbook paper. I cut the counter down to fit my space and decided to use a regular stove instead of the cooktop. She did include a microwave and cooktop printies, but the quality isn't there as they were laser printed instead of photo printed, so you couldn't coat them either and they were blurry. I did use a few of the supplied food box printies. The tall wood faucet and sprayer is from MiniEtchers

The tile strips: I found a printie strip with teapot art I liked a while back and shrunk it down to fit half-scale size. TIP: I glued it to cardboard, which I then glued to a piece of mat board. I painted the edges to match the top red borders and all was coated with Ceramcoat Waterbased Varnish. I did the same process making the deck floor, but that has indents made by pressing in the lines with a ball stylus and ruler, I decided I'm not going to do that on the kitchen counter tiles, though, as I don't want to detract from the art. 


This is the cutest stove kit, also from MiniEtchers. It went together really well. I didn't like the cabinet-stove that came with the full kitchen kit above and decided the magnet stove I had wouldn't fit. This stove kit fits perfect in the space and is pretty cute, too! I added in a tin sheet with a few cookies "cooking" to have something in there. I may add a pot and spoon on the stove yet. TIP: I edged the inside of the stove window with black Sharpie and glued a piece of plastic inside for a window. You can't really see (it would look cool lit but I didn't do that this time) I also painted the inside a navy blue and dotted it with gray paint by rubbing the paint off  toothbrush bristles to get tiny dots.


I had to change the lace kitchen curtains above, which covered the bottom of the window as they didn't look right hanging behind the stove and counter. It bugged me every time I looked at them. So I cut them off and instead glued part of the lace hanging underneath the top valances which worked better. I'll show them later when I get the counter and tiles in. This isn't the first set I've changed after they were in, ha! I added some lace in the dining room as I didn't like having a bare window, but that works okay in the kitchen.

Also decided I'm going to make a square floor mat for in front of the kitchen counters with a coordinating color striped fabric. That's why it takes so long - the decorating and deciding what to put in, and then changing my mind. ha!

So, that's it for the moment, but there are other things being worked on and more photos to come. Thanks for stopping by again! --Chris


June 26, 2021

More #HalfScale #Miniatures in the #dollhouse

 A favorite flower, also in real life: 

Know what it is???

Moving along on the decorating of the Victorian-flavored dollhouse, if not at a snail's pace. ha! But...I am making progress! (Scroll down for other posts or look in archives at left. Click photos for full size.)

So... What's new?

Putting in some other furnishings which have to be filled or decorated themselves, too! Excuse these photos, not the best, I'll try to get some other close-ups later... 

Kitchen hutch and table, set for a lunch.


The Attic: 

I think this might be my favorite room... well, one of them. ha!

The fun is putting all kinds of stuff in the attic. It'll be way more packed than this... like real life! haaa! I have to add more boxes, suitcases, those stacks of saved papers and magazines, the old furniture, I have an old wringer-washer that can go in here, too, and who knows what else... I'mstill thinking of making a roombox in this and 1" scale that's just an attic. Great place to store things instead of in drawers or boxes!


 The Deck:

I love having something different like this deck next to the girl's bedroom! I found the perfect pieces. The table was a kit in one of those small Chinese-made kits. I saw these folded paper pieces for scrapbooking in Hobby Lobby that I knew would be perfect for the umbrella. All I had to do was take the sticky pad off and there was a small hole underneath. I sharpened the end of the stick slightly and widened the hole a little so it would fit. 

(Here's the full deck before I got the fences and windowboxes in.) I'm also glad I found those metal chairs in my stash as they fit perfectly. 

I'm also thinking of getting a set of  1/24 scale tiki cups to put on the table. (Aren't these cute? see photo on Etsy. From Stewart Dollhouse.) 


I also added a wreath on the door, a floor mat and love how the fuchsia turned out! (The fuchsia was a Bonnie Lavish kit, (Dragonfly has a nice selection of her kits including a fuchsia), which I really liked doing. I want to get another one in the purple color.).

I'm working on more flowers for the front and the deck now, so hopefully I'll have some more to share soon.

More to come! See you next time!

June 21, 2021

#Dollhouse Furnishing Additions! #halfscale #miniatures


Still moving into the Victorian-flavored dollhouse! (Scroll down or see archive list at left for the latest posts. Click photo for full size.)

It's a long process. What to put in, what not to, what doesn't fit... Pictures have to be hung yet. The holdup there - do I glue or not? Hate to ruin the wallpaper, though once things are in place they likely won't be moved so glue is probably okay. 

This will go on until I decide that's enough or I don't want to do anymore. ha! You get to a point that it's time to move on to something else...

The latest is putting some new kits together. The funny part is hubby complaining about kits and where's the nice furniture? Well, he got bored and wanted something to do, so I gave him this drop-leaf table kit to assemble. Ahhh, new understanding that it isn't quite as easy all the time but the results are worth it.

These turned out really nice. The drop leaf table is from Jane Harrop from the UK. Was glad to find her really unique kits at a show a couple years ago. Hope she comes to the US again; she has some really neat retro kits I want to get yet. 

I also like how the grandfather's clock turned out. A bit fidgety as you have to cut tiny pieces of gold wire to glue inside. The Gothic Clock Case is from SDK Miniatures. I added gold paint to give it some "bling." I'll have to buy another one to decorate for the someday haunted house...

Thanks for visiting! Stay tuned for more photos... 

June 14, 2021

Moving in & Latest! #dollhouse #miniatures


Wow, I last posted in May? Has it really been that long???

Well, it's been HOT and been busy with other stuff, but I have been working on things behind the scenes.... As the photo shows, IT'S MOVING IN DAY!

To be truthful, let's call it Moving In Weeks! It's going to take me a while as yes, there is a TON more stuff than this to move in! Then there are the decorating decisions, where to place furniture, pictures to hang, accessories, etc. etc. It will be a while.

Another thing I did, not shown, is add the fencing and flowers boxes around the top deck balcony, which did finish it off. I'll take pix of that later when it's decorated.

In the meantime, here are a few of the latest things I finished recently: (click photos for full size)


Dressers for the main bedroom. Realized I had two of these so why not a his and hers?

I had to add a painted top to the men's version. Found all kinds of little tidbits to put on top - even a tiny comb! You can't see it as well but there's also a watch. It's 1" scale (from Lisa's Little Things) but it was too cute not to add! The gold case is also from a set I bought from her before she shut her business down. Too bad as she had some great stuff.

The fun part of the lady's dresser is I cut some lace to put in the top drawer. The piece on the right looked just like a lace collar once I cut it! I lightly glued the other drawers in as I always seem to lose these. I also found those teensy hairpins in my stash and that nurse's cap. I have a great-aunt by marriage who was a nurse during WWI, so I'll have to shrink her photo down to put in the room.


The Bed: I love this bed! I simply couldn't leave it plain wood, not with all those shapes on it! So I cut out pieces of scrapbook paper and painted the shapes gold. The fun is dressing it and adding all those pillows. A couple (the front pink ones) are from one of the past Half Scale Group swaps. The floral cover is the same fabric as the curtains in the room. (Look in the archives, mostly in March '20, at left column for other posts on this house.)

Kitchen: I also have been working on the kitchen. The sink is part of a set from sdk miniatures. I cut the pieces apart to fit my kitchen but I didn't like the stove image so using an older stove. The lady of the house simply doesn't want to give up her trusty older stove! (If it ain't broke, don't fix it, right?)

I also switched out the teensy faucet set for a more realistic tall faucet and sprayer I luckily had bought before from MiniEtchers. Just had to round it off a bit and paint it silver. I also painted a marble-type design on top with mostly red and some gold. 

Den: Love how the bookcase and window seat came out. I'll have a basket of maps and a few other things for the top. Also adding some art and.... debated on this, I have a couple animal heads (tiny plastic animals) for the walls. Hate to do this, but it just fits the room. Found the animal print rugs on eBay.


Bookcase: Decided to add a few other things in. Put some postcards in a bowl next to the camera. The table will go in the hall. (The photo is my dad and a friend years ago.) The carved roadrunner is also from a past swap.

That's it for now. More to come so be sure to stop by again!

May 03, 2021

Half Scale #Dollhouse Update 5 - Ta-Dah!


Ta-Dah!!! Not completely done, but - the roof is finished. (That's 3 1/2 bags @400 shingles plus a few extra - over 1,200+ shingles!) Not counting the front shingles, of course. Trim  added on tower edges.  Yay!!! (click photos for full size.) The front board is glued on the bottom for the patio and gardens. The house is 24 1/2" wide and 18" h, not including the chimney.

Keep in mind, the green shutters go on front yet, along with window boxes and some fencing on the top deck edges. I know, it's colorful, maybe a little busy, but I like color and didn't want a plain Jane house! I'm also going to do some touch-ups yet on the roof with brown paint where the stain didn't take right. (The little sun and the metallic strip are metal-look stickers from the Dollar Tree.  There's another one next to the deck door.) I forgot to add a wreath on the deck door, too, and I'll have some hanging flowers, also. 


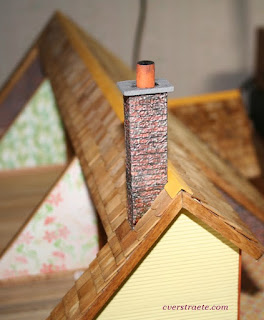
Happy how the chimney came out. That didn't take long once h
ubby, construction manager/builder, got the big, real-life saw out to cut the angle. 

Then there's the back trim to glue on all the wall edges yet and a couple inside trim pieces I missed. So, it's almost done! The front yard, I'm thinking of doing a flat sheet of patio brick once I paint it, with some bushes, we'll have a few pole lights and some seasonal flower beds that I can change out. Decided not to do a full porch but we'll add a couple steps and maybe a small railing on each side.

Hard to believe when I look back, how far we've gotten on the Half Scale Dollhouse since this first post from January.  (You can see the last post here or check other posts in the archive in the left column.)

So far... the kitchen.  I found this piece of white bumpy paper that'll work well for the front of the pieces under the frames. Then I have to paint the teensy pieces for the knobs and handles, and marble the top counters. 


So, that's it for now! Thanks again for stopping by! I have quite a few kits to make yet, so working on that, too. 

The fun of this project is trying to come up with things that are different.


The den's bookshelves are turning out pretty cool! Made a window seat to go between them. Always wanted to do that! So far... have to add some games and more albums, etc. I'll add more bookshelves in other rooms. I get tired of making books, but I like how they loiok!


Sorry for the crooked pic. The mailbox I got in a past Half Scale group swap was a great touch. (Have to add some numbers on the top yet, and a wreath on the door!) 

That's it for now. Thanks again for stopping by! Stay tuned for more updates!

April 26, 2021

Half Scale #Dollhouse Update 4 Shingles!


The latest - some "small" updates! Shingles! (Not the kind on TV!)  (Click photos for full size. Find recent posts in archive in left column.) ** On the last few rows on the back side now. Almost done!!!

Yeah, never, say never. Ha! I wanted the asphalt shingles but the construction guy chose the wood. He's doing the shingling, so this is where we're at so far. Mixing the styles (and hoping we have enough!) Nearly used one bag (400 shingles) of square ones so far.

You see a peek of the trim in the photo above, so here's a look at the windows with the top trim. I'll be adding light green/sage shutters on the front windows yet. Have to add thin gold trim on the tower yet but no shutters. I like how they turned out so far. They're painted a pine green with gold over it.


Nothing too exciting here yet, but at least the sink counters are in progress. We cut the right angled part slightly shorter so I can fit it by the window though my windows and curtains are kind of long. But have to make it fit.


Here's the office/den wall cabinet so far. A few books and binders, and probably some newspapers, to add yet on the top shelf. The painted charms made nice bookends. And I found a tiny metal camera that I painted. Just have to add a tray and some piles of photos! Even found that metal paddleboat at the last minute, which fit the theme! I'm still debating - I'm not too keen on the plain doors so I may find some tiny travel images to put there yet. Not sure. I do have some postcard images that could work. 


That's it for the moment! Getting there... thanks for stopping by again!


April 19, 2021

Half Scale #Dollhouse: Updates 3 #miniatures


 It's time for another showing of the latest updates to the Half Scale Victorian Dollhouse! (FYI: Scroll down for all the latest posts on the house, or you can look in the archive list at left as well. Click photos for full size.)

So, what's this above? I finally found a few of the new DIY Minis line at Michael's. (After two trips, mind you.) It is a mish-mash of scales, some rather cute pieces, some meh, but there also were a few that can be used for half scale. I couldn't resist this little fireplace for the corner of the deck as the colors matched perfectly - and it lights up! I also added a touch of red-orange paint to the flames.  Here's another photo where I covered the flash: 


What else? Most of the trim has been added in the rooms, though photos have a way of showing  things you didn't notice before! I now realize that I need to add a piece of trim wood next to the staircase in the hall! Wish I'd seen that before the lamp was put in. Well, it figures, right? 😁


Here's the wall leading to the attic bedroom. I made the door. It worked best to cut a piece from the flooring since it already had the grooves in it! (Yes, there is a piece of wood trim on that wall since I took this photo! ha!)


If I have to pick a favorite room, it might be the attic (on second floor left next to the fern art room above). Love how the brick and wood looks! The ceiling is one of those blotchy scrapbook papers that has an old look to it.) I may even add some cobwebs in the corners yet. I may make the attic really spooky near Halloween. That'll be fun!


Here's the small second floor bedroom to the right of the art room. The door leads to the deck. There's now a small strip of wood across the top which will be shingled.


Also added a sconce on the kitchen wall below. There will be a work table under it. The kitchen counters will run from the left, with sink under left window, and out to the right. It leaves room to split the cabinets to have the ovens on the back wall on one side and the pantry/fridge on the other side on the right. Unless I change my mind again! I'm thinking of the same vintage white/cream color I've been using. Not sure yet of the paper inserts on the cabinets.


A few things I made recently:

Bookcases from kits by Ani. I added the matching scrapbook paper inside.(Yes, have to touch up a few ends with the stain. I hate to keep retaking photos!)  They'll fit the office/den, next to the window. I want to put a window seat between them, hoping that works.


Plant stand: Made from a couple extra wood boxes from a half scale kit and a wood block. I added brick paper and embossed stickers I found at the Dollar Tree. Haven't decided on what flowers to add yet. Then I'll glue the pots down.


This neat wood carving is going on the peak at the front of the house. I was lucky to have just found these and painted it to match. There are a few others but this one worked best.

A set of cool new animal-themed rugs I found on Ebay to fit the office/den and the art room. There are a few more not shown here. I bought them as I wanted the shaped ones!  I'm going to add large ferns for a tropical look in the art room.

So... that's it for the moment. Shingling is next and then the front. Also have to add the wood trim on all the back wall edges. Thinking of using a brown and white clay square sheet I've had forever to form a front patio plus an area for bushes and a garden. It will have a few steps down and the railings just in front of the door, I think, instead of having the usual big porch. We'll see!

Thanks for stopping by again! Come back soon for more updates!