
It's time for another showing of the latest updates to the Half Scale Victorian Dollhouse! (FYI: Scroll down for all the latest posts on the house, or you can look in the archive list at left as well. Click photos for full size.)
So, what's this above? I finally found a few of the new DIY Minis line at Michael's. (After two trips, mind you.) It is a mish-mash of scales, some rather cute pieces, some meh, but there also were a few that can be used for half scale. I couldn't resist this little fireplace for the corner of the deck as the colors matched perfectly - and it lights up! I also added a touch of red-orange paint to the flames. Here's another photo where I covered the flash:

What else? Most of the trim has been added in the rooms, though photos have a way of showing things you didn't notice before! I now realize that I need to add a piece of trim wood next to the staircase in the hall! Wish I'd seen that before the lamp was put in. Well, it figures, right? 😁

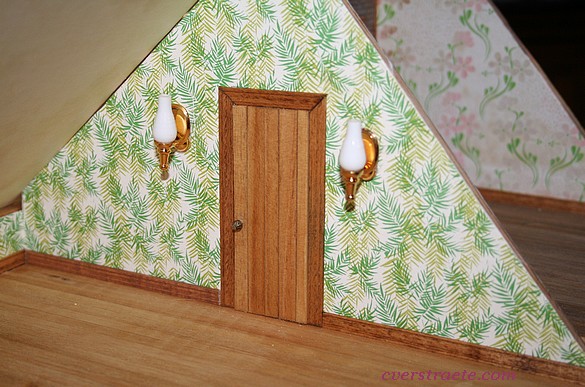
Here's the wall leading to the attic bedroom. I made the door. It worked best to cut a piece from the flooring since it already had the grooves in it! (Yes, there is a piece of wood trim on that wall since I took this photo! ha!)
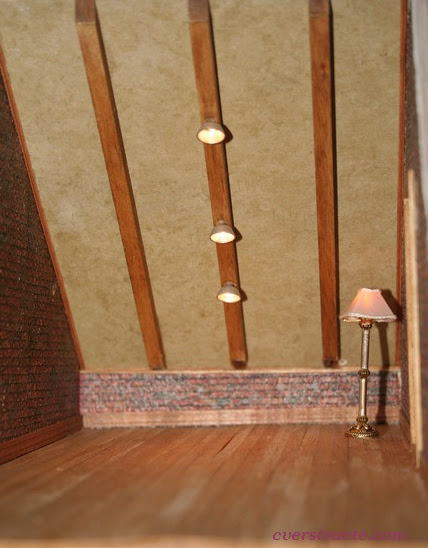
If I have to pick a favorite room, it might be the attic (on second floor left next to the fern art room above). Love how the brick and wood looks! The ceiling is one of those blotchy scrapbook papers that has an old look to it.) I may even add some cobwebs in the corners yet. I may make the attic really spooky near Halloween. That'll be fun!

Here's the small second floor bedroom to the right of the art room. The door leads to the deck. There's now a small strip of wood across the top which will be shingled.


Also added a sconce on the kitchen wall below. There will be a work table under it. The kitchen counters will run from the left, with sink under left window, and out to the right. It leaves room to split the cabinets to have the ovens on the back wall on one side and the pantry/fridge on the other side on the right. Unless I change my mind again! I'm thinking of the same vintage white/cream color I've been using. Not sure yet of the paper inserts on the cabinets.

Bookcases from kits by Ani. I added the matching scrapbook paper inside.(Yes, have to touch up a few ends with the stain. I hate to keep retaking photos!) They'll fit the office/den, next to the window. I want to put a window seat between them, hoping that works.

Plant stand: Made from a couple extra wood boxes from a half scale kit and a wood block. I added brick paper and embossed stickers I found at the Dollar Tree. Haven't decided on what flowers to add yet. Then I'll glue the pots down.

This neat wood carving is going on the peak at the front of the house. I was lucky to have just found these and painted it to match. There are a few others but this one worked best.

A set of cool new animal-themed rugs I found on Ebay to fit the office/den and the art room. There are a few more not shown here. I bought them as I wanted the shaped ones! I'm going to add large ferns for a tropical look in the art room.

So... that's it for the moment. Shingling is next and then the front. Also have to add the wood trim on all the back wall edges. Thinking of using a brown and white clay square sheet I've had forever to form a front patio plus an area for bushes and a garden. It will have a few steps down and the railings just in front of the door, I think, instead of having the usual big porch. We'll see!
Thanks for stopping by again! Come back soon for more updates!