November 30, 2022

Fairfield Dollhouse: Ready for sleep

 The small wall sections will be glued in next in the attic, but for now I played with some other things. Here's the last post. Also check in the archives list in the left column for older posts.

The Bedroom - 

Ta-dah! The bed is done. I just love the swirly pattern on the sheets. I put some bottom supports in so the drawers don't fall out, but they do slide through! I'll add some more stuff - like a toy car and some comic books - in there later. But if you peek close, you'll see the boy hid some candy bars away for later! Shhh, no telling! 👱 The starred blue paper on the headboards is what I'm also using on the back wall. (Click photos for full size.)


The floors are in on both sides of the attic. Also added the trim around the stair opening at the end, and have to add the wall trim yet. Lots!! of trimming in this house. The stained glass isn't in the small windows yet in case I need to reach through.  

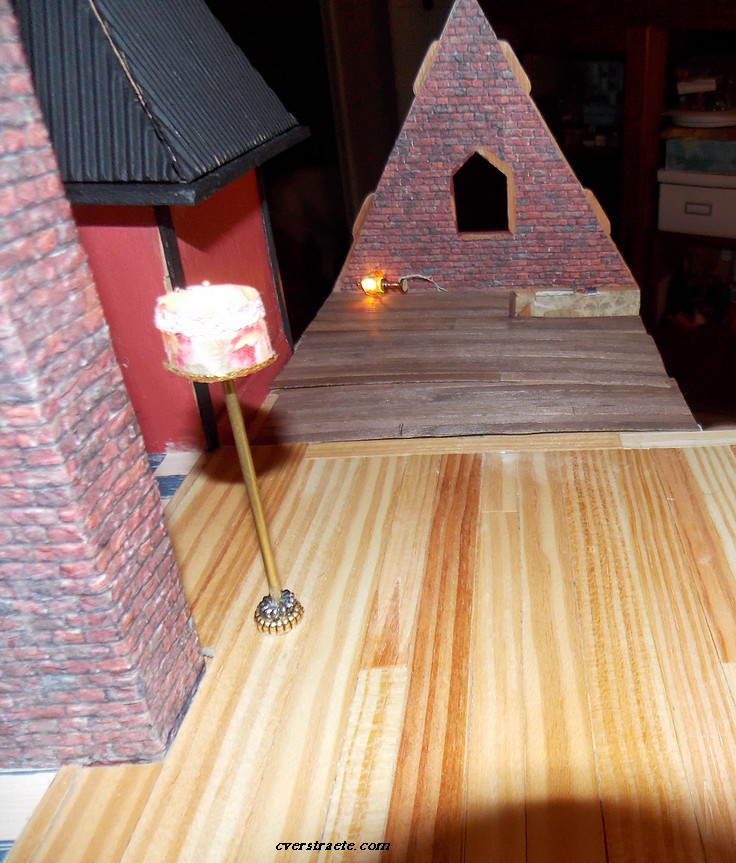
Figured out that a small bath will fit in the area in front of the tower there (the reddish wall; the roof isn't on in this photo.) Luckily I had an extra toilet and sink. I cut and brick-papered two angled walls that'll be glued once I put the back roof on. (* Caution if you're building this house: some of the bottom rows of the roof (like the back piece that fits here in front of the tower) have to be shingled first before installation otherwise you can't reach them!) The bath will have a faux "folding door" in front. (Partial piece of painted corrugated paper.)

Also got some of the trim glued on the outside of the tower. I have to add some pieces underneath the top too. I'm also adding painted trim on those edges on the tower roof. I covered it with painted corrugated paper. There is a hanging light inside. (The tower roof is a juggling act. Had to paper the inside tower ceiling, paint the outer edge where the paper showed, and juggle holding the tower and pulling the light wire through the hole in the side before gluing the tower piece on. Definitely a two-person job!) 

(* Shingles: see how the roof piece butts up against the tower? That's why you have to shingle the bottom rows before gluing the roof piece on.) 


Making swaps

In the meantime, I'm working on the annual Half Scale Group swap, which is due by February. I'm starting early since I already decided on what to make. I can't show it or hint until after it's opened by group members. The group chose my suggested theme, Kitschy, which I was surprised about and should produce some interesting items I think. 

What is Kitschy, you ask? The dictionary describes it as "garish, sentimental and sometimes in bad taste." ha! Think fad collectibles: velvet paintings, dogs playing poker painting, big-eyed kits art, giant wooden kitchen wall utensils, just thought of those paint by number paintings, etc, etc. You get the idea... (And I am so hoping someone sends that giant fork and knife or spoon! haaa! Otherwise I'll have to think what scale I can use in the half scale house as I want to add those to the kitchen wall now that it's on my mind.)

Here's art I made last year included with gold trophies and a box printie:


The theme is only a suggestion as people can make what they want. There are 21 participants this year. Here is last year's  swap (theme: antiques or attic, I think)  and one of the past swaps (theme: toys). People always make great stuff and it's such fun to get in the mail! Been doing it for years. I always look forward to it. (That tiny clock from last year's swap is now on the Fairfield's bedroom fireplace mantel.)

Chris Verstraete www.cverstraete.com

Thanks again for stopping by! Come back soon for more updates!


November 23, 2022

Happy Thanksgiving, Fairfield #dollhouse attic

 Wishing everyone a Happy Thanksgiving!


In the meantime, here's a quick Fairfield dollhouse update: (Here's the last post - bedroom reveal.)

Working on the third floor attic rooms:


Yeah, this is what happens when you're trying to get the floors to hold down. Using everything but the kitchen sink. haaaa! But it did work out pretty well:

The left room will be the boy's bedroom. The back wall isn't on yet so that's the back of the tower you see (which will be covered with painted card and trim.) The back ceiling wall will have blue star wallpaper and beams.  Oops, forgot to solder in that lamp. There also will be a fake wall and door between the two rooms on the left of the chimney wall.


The room on the right here will be a library-craft-painting studio. Luckily I had just enough left of this fake wood flooring (from Hobby Lobby) from the bigger dollhouse that I can use here. The back room, which has an opening on the right edge for the spiral stairs, will be the attic junk space. I've gotten hooked on adding that catch-all space for odds and ends.

 I also have just enough of the thin dark wood floor pieces left from the second floor to use here. There is an opening on the back wall (once it's in) between both rooms. I might just add part of a faux curtain between the two spaces as it really doesn't have to be closed off. Maybe I should squeeze in a small bathroom in the back there, too, otherwise that boy will need a chamberpot. ha! We'll see. I may be able to fit it just behind the wall by the tower there; also have to consider it will have a sloped ceiling. But all I have to do is partition the space off. I'll think on that. I better figure it out as I probably have to add another light then.

Also started this:  the pieces shown are for the bed.

Don't eat too much turkey! 

Thanks for stopping by. More updates coming soon!


November 20, 2022

Fairfield #Dollhouse Bedroom Reveal

 I don't know why I've put off showing this but...

I know, it's past Halloween, but not in the dollhouse! 😏 I've been working on small things and am now in the attic. Have to attach lights there so I can do the paper and floor... 

But... Ta-da! Something finished! The room is apart at the moment as I work on other things, but the light is in since these photos. (See last update. You can also search in the archives list in the left column.)

I love how this room has a kind of antique but comfortable feeling. I just love this room!

Here's a glimpse of the ceiling before I put the ceiling trim in. (Oh, what a job that was fitting it in!) I love the Victorian flavor of this pic, like an old manor house. The ceiling is that embossed scrapbook paper with some gold brushed on.


This is a different approach for me. I bought the handmade bed second-hand with some terrible fabric on it. It was so old that the foam underneath had crumbled. The forms are made of foam core. I glued on new foam and recovered the pieces. This time I decided to glue the top cover on each side without using any edge trim and folded the end of the bed cover. I wanted brighter colors to coordinate with the wallpaper but didn't want to use an actual Halloween print.

I repainted the 1930s Tootsietoy dresser with chalk paint topped with brown acrylic paint, and added gold to the accents. I glued on small beads that I also dotted with gold. (I use gold fabric paint.)

I found some wooden shapes at the dollar store and cut one in half for the front fireplace grate.

The small bookcase is from SDK Miniatures. I'm making a few more books and have to add some accessories yet. The chair by the door was from a set that I recovered with new fabric. I found the mirror some time back at Michael's.

 I added a few creepy touches with the framed photos. The rug was cut from that Day of the Dead fabric I bought. Thought it would make a perfect rug so I glued one of the faces to tea box card and then edged it with Bunka. I made the draped table, chair, and footstool but may switch those out later. I am thinking of putting some Christmas decorations in the house soon.


(Overhead shot while I could get it. The clock on the mantle and plant are from the Half Scale Group swap. I'm making books for the bookcase at the moment. Found some nice horror books with great graphic covers from Wowbooknook on Etsy. Nice books and they include 1/24 in the set.) I printed some slightly smaller (7/16" and 1/2" h) to fit in the small bookcase shelves.

I'm experimenting, so I also tried making a video to show the full room. (Here's the YouTube link also.)


So many odds and ends pieces I'm working on, but so many parts can't be added until something else is done first or to make sure I don't have to lay the house down again. The spiral staircase has to go in the second floor yet too. 

I'll have more rooms and additions to come so be sure to stop back.  You can sign up for headline updates in the box in the left column. You can also see more Fairfield photos in the archive listings there, too.

Halloween is never over...

Oh fun! I forgot that I had these little decorations and found a rubber ghost for the porch. He looks pretty cool lit up! The railings won't be put on until everything else is done as I already keep loosening the porch posts on second floor so I have to reglue those. 

Have to search in my stuff and see if I've got any Christmas things or trees that I can put over the lightbulbs...

Chris Verstraete www.cverstraete.com

Thanks for visiting. Come back soon to see what's next!