February 28, 2024

Half-Scale Mansion Diner - Almost Open!


Moving right along on the diner project in the lower level of the Half-Scale Mansion. (* See last post - fries; see more posts in left column archive. * Click photos for full size better view!)

Most everything is done but I'll be adding a few things yet so that's why I'm saying it's not open yet! I have to get another table set at the show and still trying to figure out a small gift stand near the door. (It'll have to be a small vertical shelving unit since there really isn't much room left!)

 I know this isn't the usual layout for a "mansion" dollhouse, but I'm glad I decided to do something different as it's been fun trying out new things.

The cooking counter: 

This came out even better than I expected! 


It's fun to see it with all the food signs up! (Yes, I have to add the pipe under the sink yet!)

What I'm really happy with is how the food came out. After I made the food on the grill (air dry clay painted with burnt umber and red with white acrylic paint), I added some "grease" using the Glaze I have. Added some more glaze then with a touch of the burnt umber to make it look like the dirty grease. Perfect!

I glued a couple stove grills I had left to a card painted silver, then scanned it for the cooking area to the right of the griddle. Figured it was the easiest way to do it. The spatula is cut from the inner metal coffee can liner.


The back is the embossed inner coffee can lid glued to matboard, Knew I kept saving those for a reason!


I decided the window looked too bare, so I added a red-check curtain to match the chair seats. I also added another small counter on the right of the eating counter so the cook has another place to set food. There's a crate underneath that I'll add some cola bottles in, I think. But this is not just a counter...

The side counter has a secret... I decided to use the dishwasher kit I had (old MiniEtchers kit) and figured I'd put it under a counter for more space. He doesn't want dishes piling up when it gets busy!

I have to get another cafe table set (SDK Miniatures) at the show in April, so I have one for now that I painted the silver with a red speckled top. I'll need some pots and pans, too.


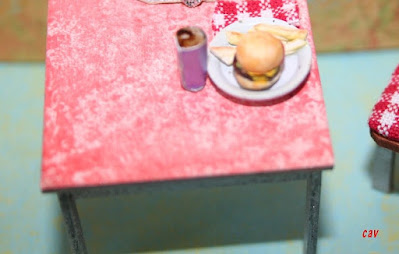
The burger and fries is again air dry clay. The cup is from the past Half Scale group swap. 


I made a short video to give a view of the full diner:  (Or watch on YouTube) Yes, I'll do a better one later. 😏

So, almost there! At least on this floor. There's a lot to do yet: furniture for the other floors, flowers outside.... Stay tuned!

Thanks again for visiting! Come back soon for more updates!


February 19, 2024

Half-Scale Mansion Diner: Fries Anyone?

Fries, anyone???

 I'm on a roll! Or should I say hot dog or hamburger bun? ha!

Well, I'm pretty tickled with the latest results in the Park Ave. Mansion's half-scale diner. (* See last progress post; and other posts in the left column archives. ** Don't forget to click photos for full size to see them better!)

Decided to work on more fries, the diner back counter, and a big part - the fryer. This is the thinking part, but fun when you get to figure out an idea you have in mind - and that it mostly works without a lot of screaming and, er, some swearing! ha!

Now bear with me, if any mistakes show or things are missing yet that I have to fix, add, or fill in, but I was pretty happy with how the fryer came out!


It started with a plain block of wood I had which was cut down slightly. The block is 1" long and just over 1/2" wide and about 1 3/4" or so high. I cut and glued strips on top to make a box, then added two wood strips on the top of the back edge with tiny sequins, seed beads, and straight pins for knobs on the control panel. The front has some painted corrugated cardboard which is a bit smashed to give it a used appearance.


The basket is needlepoint canvas cut to a square shape and folded to form a box. The handle is silver metal cut from an embossed coffee can liner. I also used the embossed pieces for the counter backsplash. I'm very happy with this as I had it in mind and luckily found a piece of canvas in my stash! Hungry, yet? 😋


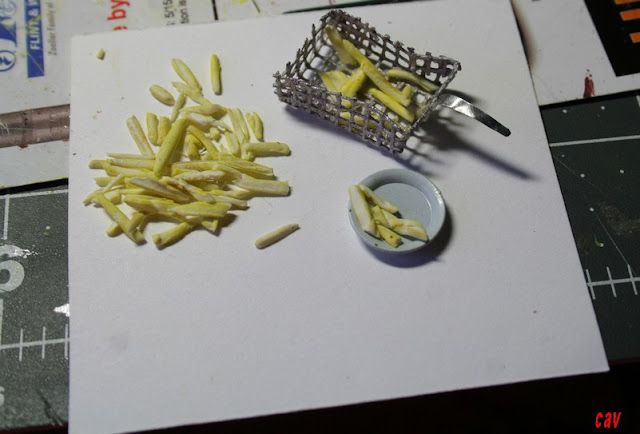
The fries are still being "cooked," but are simply Crayola Model Magic air dry clay touched up with yellow pastel chalk. I have to add more, then add some rust color pastel to make them look more done. Then I'll seal them with matte Modge Podge and add some gloss varnish to make them look shiny and to have some "grease" in there. 


I'll fiddle around with cutting and arranging the fries more, too, but if I do say so, they do look like fries. They are tiny enough to get away with just giving you the idea of what they are. I just wish I could get the photos better to show that. I'll take more photos later outside in natural light to avoid the flash bleaching things out.


As you can see in this unfinished photo, the fryer goes at the right end of the counter. I'm also using part of the embossed metal from a coffee can liner for the counter backsplash, which I glued to picture framing matboard. (see below.)  I've been saving those for ages, knowing eventually I'd use them. And even better, I even found them when I wanted to use them. haa!

Here's the counter below without the fryer. The backsplash worked out well. The dividers on top of the counter are "splash guards" around the grill area. The left counter will be a prep area. I'll add some food cooking and try to make it look like grease, I hope. The stove burners and knobs will be to the right of the second guard piece.


 I hate showing half-done pix, but I couldn't wait. ha! Next, I'm gonna add the rest of the backsplash, the faucet, burners and knobs, wall shelves, upper fan, and some food signs and art. Plus I want to try making some pots and frying pans from manila folder or card to stack around and under the counter. I also have to stack some dishes and glasses, and fill the sink up! And then there are more tables to add and a gifts shelf/counter besides the front customer counter you saw last time. 

Digging around in my stash, I found some veggies I got from past swaps, and cakes, too. Maybe I'll add a desserts table using the bottom of a hutch though I might have to figure out a plastic cover for that so the place doesn't get shut down by the mini health department (even before it opens!) haaa!

So far, so good! Turning out better than I expected. Stay tuned for more progress!

Thanks again for visiting and come back soon for more!


February 15, 2024

Progress at the Miniature Half-Scale Diner

Things are moving along in the half-scale mansion! (*See latest post; others are listed in left column archives. Click photos for full size. *See exterior so far. Am adding flowers and windowboxes yet.)

While most people build this brownstone-style mansion as a modern three-story single-family home, I wanted to do something different. That's why I decided to put a diner on the first floor. I'd never made a restaurant and thought it would be fun to do in half-scale. Always looking for a challenge and trying something new, even if some parts of this can be pretty difficult.

 I know you already saw the food I made so far, the eggs and a hot dog plate. (Yeah I see the top moved; will fix that.)


I have to make some more food, too, and I found another sandwich plate I made, but that's for other tables once I get to that part. This time, I finished the front customer counter, adding the front logo and putting out the food, drinks, and menus. I like how it came out but this had some pretty hard parts.

The stools are from MiniEtchers. I have one more to add here but I wanted to show the logo on the counter. The counter was a wood block I covered a while back with painted wainscoting. The top is wood covered with the same marble paper as on the second floor fireplace.


I'm really happy with the menu set-ups, even if there was a bit of aggravation with that part and I probably have to make a few adjustments yet. ha! The salt & pepper shakers are tiny silver bead findings with an 1/8" circle on top. I used the same size cut-out to put the initials on the front of the beads. The ketchup and mustard are cut from the mini Lite Brite pegs, with teensy tips of toothpicks glued on and the whole thing painted. I shrunk down vintage-type menus and glued everything to sparkly glitter card.


Added: FYI: The peg I used is from the mini Lite Brite game. Here's a comparison. The larger peg/regular game is 1 3/4" long. I cut off the straight part on the small peg. It's slightly pointed but I couldn't get it right sanding so I gave up though it would be easier in one piece. I may try again.

The back counter partly shown in the back has since been spray-painted silver (the top surface and right lower section) and looks pretty good. I wanted to add some necessary pieces like grill dividers, knobs, faucet, etc. before I show it. Also am figuring out some food for the grill. I have some embossed silver pieces (cut from a coffee can inner liner) that I'm hoping to use as a tile strip around the back of the counter's top. I also have some food signs and shelving to glue on the walls. I do have to make a couple more ketchup-mustard bottles yet (which I'm dreading!) Don't ask how many pieces got dropped and lost. haa!

Shows are coming up, though I hate to wait until April to buy some needed things like half-scale pots, a couple cafe tables/chairs sets, and maybe a few shorter shelf units or a bookcase I can use for a display shelf for gift and holiday items on the left side of the room. It would be fun to be able to change this for holidays if it isn't too hard to get inside once I get it covered. So, that's the plan!

Thanks again for visiting! Be sure to come back soon. More to come!


February 09, 2024

Happy Mini Valentine's Day & New Find


Something fun! One of the members of the FB HalfScaleMinis group shared a sheet of Valentines to make, so this was a simple little project to do in-between figuring other stuff out. Also added a few in a teensy red basket. Love vintage Valentines! (Click photos for full size; see archives in left column for other posts.)

Interesting find at the Dollar Tree store. They had some new metallic stickers. I thought these would be perfect for a tin ceiling or for center ceiling medallions! The stickers are 1 1/4" square. Neat, huh?


Just a short post. Making some flowers and other things next.

Thanks again for visiting!

February 05, 2024

Half-Scale Mansion - the Latest

Adding some seating on the mansion's rooftop garden.

*********

 Been working on a few things between the real-life big project. Ugh. Don't ask. (Involves a kitchen floor.) So glad that is over!  (*See last post and other posts in left column archives. Here's the exterior.  Click photos for full size.)

Since the exterior is done, except for making plants, I've been working on a few kits. I did - finally - get the kitchen sink 1 built from the D-Tales kit. I think it turned out pretty good for the chef's small efficiency kitchen (third floor, turquoise room.) I'm saving the cabinet part of the kit in case I need it for something else. May add a couple of the top cabinets, too, if they turn out right.


I  put the bed in temporarily; I think I like making it into a small efficiency room. I'll making a sleeping/sitting area on the other side where the chef's daughter can stay as she works at the diner, too. The bed shown here is just to test for size. I'll make a new one to match the room's colors.


The second kitchen counter for the diner involved combining some of the MiniEtchers kitchen pieces, adding an end piece, and cutting an angled counter. The angle wasn't quite right but I got it to work after fitting, gluing, and adding wood filler. Will cut down the wood block on right side to build the fryer at the end. I have to paint and add knobs yet.

The first two counters and the corner section under the angle are MiniEtchers' kits. I made the rest of the counter and the sink.

I'm leaning toward white cabinets with a silver top since I redid the customer counter below since I found a counter bottom I made awhile ago. The top is marble paper (the same on the top of the fireplace on the second floor.)  I'm going to add a giant cola sign, I think, on the counter front, plus I have tiny menus and have to make the condiment bottles. Also am working on the counter stools, also MiniEtchers. Then I want to add a couple cafe tables and some shelves for gifts and such on sale. Slow-going here as it's all these little things to figure out.

Fun food:

This was fun. Dug in my stuff and found I'd made some fried eggs before. Just added brown on edging and gloss. The toast was made from cutting pieces I molded from Crayola Model Magic with light rust color pastel rubbed on. I seal these with Matte Mod Podge or spray matte acrylic.

The challenge here was the bacon strips. Thanks to an idea from my friend Gigi, we cut some small strips of folded light cardboard/heavy paper that I painted with a mixed red-brown acrylic and tan for stripes. Then I added some brown on the edges and gloss. Be sure to look at the full size of this one. I think it looks pretty good!

I also made the hot dogs a while ago from Fimo clay; the bun is Model Magic topped with "mustard", (yellow paint) and tiny chopped pieces of fake green plant for some relish. Pretty pleased with how the fries turned out - teensy strips cut from Model Magic that were colored with yellow pastel chalk and some dark rust in spots. This is so tiny that you just have to give the impression of the real thing.

Yes, this is the slower stage now as I finish some kits, make some new things, change my mind, etc. haa! 

The second floor entrance:


I really like this entrance area. I added white wainscoting on the walls next to the door and decided it needed at least a small divider. I used a foil rub-on I had to make a couple dividers attached to pieces of the real-life plastic corner molding I cut down. I wanted to add something between the areas so I think this works out well. I have a vintage gold jewelry piece in front of the fireplace opening. It's not  glued in yet.

There's still a lot to do yet: furniture to add, art, and re-arranging, so I'm far from done! I'm probably making a chaise lounge and two chairs for the entrance area, plus I have to make the bedroom furnishings yet for both floors. I'm thinking of a white fabric with gold glitter for this floor's furniture. I also might add in these colors and prints to play up more of the gold:

The Roof Deck: I added a piece of paving-flooring to make a seating area on the roof deck. Still working on adding plants and things here. Oh! A visitor showed up, I see. Yes, there will be more dogs. Also working on the windowboxes and flowerpots for the front.

That's it for the moment. Will be back soon as I get some other things finished; probably flowers. Moving-in day should be coming up soon I'd think, but that's up to the furniture supplier who seems kind of slow! ha! 

Thanks again for visiting!