October 18, 2022

#Fairfield #Dollhouse: The Latest, Again


Photo: Exterior first floor porch, left is the former door, back of kitchen wall. 

Waiting to put the posts and railings until I'm done with any outside trim. I don't want to lay the house down again once they're installed. Yeah, I know, have to add the top on the light. ha!

 (Click photos for full size.)

Just a few photos of the latest things finished. 

Porch/kitchen wall:  My makeover of the wall is done! Lucky, lucky me! I held off on putting brick paper on the kitchen wall as maybe, just maybe, I had a piece of the orange paper left.

Yay! I'd looked everywhere and finally looked in this other box and found one piece big enough for that wall! See last updateupdate 2. The brick would've been fine, but I wanted it to match. So, now that is done! Luckily it's such a busy pattern that you can't tell where I patched it. Next time, I'll make some of the kitchen kits and see how things look and where to put them. I just love these prints!

Before: 


After: 

Much better! Now I have another wall to use. The room really didn't need two entrances. 

Top porch: So far - I decided after all to use the floor pieces I'd previously cut and painted to match the bottom porch. Figured it looked best the same color. I decided to go with the lighter color corner trim to match the windows and door trim. Glued the posts, but I'll add the railings once I'm done gluing them together. Have to finish trim on porch and top once the cupola is added since I have to measure the pieces to fit. 


Bedroom: For fun, maybe I'll leave the pumpkin in the girl's room fireplace for now. 😃


Have to add some grates in the other fireplaces yet. Found some neat pieces to use.

Dining room: Got the curtains in. Love how this looks. I used a sparkly web-like ribbon for shades and made valances also in a monochrome tone. I made them by folding the strips to make small pleats. I also have the bedroom curtains made but have to glue them in yet.


As I showed earlier, the adjoining living room on the left side (below) is in similar black/white tones and also uses the same striped paper. I really like these rooms. Planning the color theme is the best part, next to decorating and filling the rooms, of course! In case I didn't mention, I use all scrapbook papers as I can get a good variety and the papers are usually heavier. Plus, I can pick them up at Hobby Lobby or Michael's if I need more.


That's it for now! Thanks for visiting again. More photos will be coming - and Halloween in Miniature is coming up so be sure to subscribe for updates (box in left column) and come back soon!

October 03, 2022

#Fairfield #Dollhouse Uh-oh. Chhhhanges!

 Time for a good laugh. You'll like this one.

So I was making progress. Besides the last update - and the changes. I was getting ready to do the top porch and glue the posts on the first floor porch. Then the contractor (yours truly) fixed a flaw in the kitchen floor (and might still have to do another patch) and glued the bottom kitchen bay window section on (see above). I also got that side's brick done. The brick and trim still have to be added onto the bay.  (sorry for the crooked photo.)

Kitchen inside: the shades look nice, don't they?


Glad that's done. The bay's all trimmed inside, but.... Wait a minute. What happened to the door moldings and baseboard pieces?

Well....

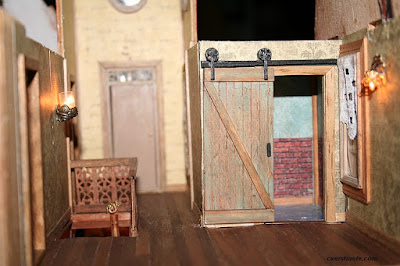
The homeowner, you see, started testing how things would look and while the thought had come to her before, she wondered.... why do I need a second door in front? That wall would surely add much-needed space to the kitchen... And it would also give me more decorating space on the porch...


Door into kitchen at left; main door opening into hall at right.

Above: The door to the kitchen (right) and main front door (in hall left with staircase,) leading into kitchen. The back of the staircase is in the kitchen. See what I mean? What a waste of space!

So.....

This happened. Haaaa! 

Added NOTE: Even funnier, someone mentioned they'd done that to their house and others did too. I looked at a lot of photos early on and just didn't notice it! haaa!

Honestly, I think this wall is cursed. (Maybe I should've made it into a haunted house! haa!) I redid it twice when I shorted out the light and moved a new light to the other wall. I got the wall sided (again) and the door in, but the kitchen layout still bugged me. Lesson here: figure this stuff out in the building stage, not later (like me.)

So... I had put the trim in the kitchen and thought I'd glued the door in and realized I hadn't. Lucky for me as the door popped right out. The trim all came off easy, too. While the exterior siding was glued good enough not to fall off, I had to dig a bit but finally got it off. 

Fortunately this isn't a major fix. I'll redo the siding (third times a charm!) and then redo the inside wall. The problem is I may not have more of the orange floral paper but I think the brick will look good here instead. And since the wall is bricked outside on top, it'll seem like the homeowner sided over it on the bottom outside but left it as is on the inside. Problem solved! 

And yeah the light probably would look better on the new wall (in the original space!) Never mind. I'll put a wall plant holder or something on that side. I kind of like that idea. Maybe make a cozy reading space...

Then I can finish that porch. Really. I will try not to find anything else that bugs me. haa!

Until next time.... Thanks for visiting!


September 26, 2022

#Fairfield #Dollhouse Furniture & Porch

(Chantilly haunted house on left.) Click photos for full  size.

The Porch:

Not done yet, but one of the things I'd been putting off was figuring out the porch railings on the half-scale Fairfield dollhouse. Always worried I'll cut them wrong or something, I guess. I had some flat railing pieces I didn't use from the recently finished half-scale Van Buren haunted house (which I still have to furnish on the inside), but wasn't too keen on them. I thought of using plastic railing, but I didn't want to buy more and the ones I had were too big.

I'd bought these "wrought iron" chipboard fence pieces before from Alpha Stamps. I'd cut the top row off and used it on the balcony of my other Greenleaf Chantilly Haunted House. (See part of the railing in the top house photo at left.) 

I cut the railing pieces to 1" height (they're 2" high) and used half glued into the wood railing channel pieces. I hate to show things unfinished but I was so happy with how these will look. I wanted a more delicate-looking railing so these work out great. You know how it is when you have something in mind and that's the only thing you want? ha! 

The whole railing piece will be painted black, which will go nice with the black trim. I also have to finish painting the porch posts; decided to add the porch floor color on them, too. The railing on the top porch will be slightly different and may use the pieces that are a bit shorter, but they'll look about the same as the other wood rails are a bit thicker. I want to  use what I have and it all will look similar enough. That floor will be a different color anyway. Leaning toward the worn wood look so far, but I may change my mind, of course!

Playing Around: 

 Got the Tootsietoy furniture pieces I bought so was doing some positioning. I think these will work well in the rooms once they are re-painted. The other pieces should fit in the front hall and maybe upstairs and in the dining room, too  (See previous house update here.) 

I like using this table instead of a nightstand in the main bedroom, I think. We'll see how it all fits in.

Also wanted to share this cute fabric I just found at WalMart. I'll have to use it somewhere. Loved the dog print! I just might use part of the dog print in the girl's room. 


That's it for the moment! I'll share more once the porch pieces are painted and installed. Then I'll be also adding the second floor ceiling/third floor and working on those rooms next.  Onward!

Thanks again for visiting!

September 23, 2022

#Fairfield #Dollhouse Rooms: Update!

Exterior: Starting to look like a house! Yes, I have to add siding pieces and trim around the bay section yet. Working on top porch, deciding on color, and what to use for the railings. Have to add black trim on tower plus put in attic windows and stained glass. Deciding on finish for stairs. I'm also thinking of making a few flower boxes for some windows. I think that'll be a nice touch.

(Click photos for full size.)

Still working on the Fairfield Dollhouse, but there's a lot of progress, even if I've been slow posting on it. (See last update.)

Still plenty to do on the outside. That's why this takes so long. ha! I really don't like the trim work. I like the decorating and picking the colors, etc. but it has to be done.

Inside: I already showed the first floor on the previous post. (Link above.) Once I do a final adjustment in the kitchen I'll attach the kitchen alcove and the first floor will be finished. Now the second floor:


Hall and tower room: I have to add the small back wall (leans on the roof) on the tower once the third floor/second floor ceiling is added. The tower uses scrapbook paper with handwriting on it. I left out the third floor there to make a tall ceiling room. The ceilings for this floor are papered; I just have to glue on the ceiling light fixtures. It took some fitting and cutting to get that room to fit next to the window!

The staircase rail enclosure was made using pieces cut from those wooden Chinese fans. I've used those in all three of my houses since they always turn out nice. Once the floor is in, I'll finish painting the spiral staircase and install that next to the small light on the right wall. 


Hall: The bath is just large enough to fit the ceramic tub and toilet (set originally from Hobby Lobby), and an old Mattel Littles pedestal sink. I lost the toilet seat so made a new one from Model Magic clay and painted a piece of wood for the cover. I added a small scrap of wood painted silver for a handle. The mirror (from a past Half Scale Group swap) was a perfect color to use here. Only the tub and maybe the sink will show once you peek inside the doorway but I still have to make it all look right. (Sliding door, previous MiniEtchers stock.)


 The light on the left wall was made using some small glass tube containers I found at Hobby Lobby some time back that look like medieval lights. They have a cap and are held together with a pin but I only needed the bottom piece and tube for this.  This is the small one; there also are larger ones about 1" or so tall.


Bedrooms: The doors in the hall open into the bedrooms. I added brick-papered walls on each side of the center fireplace in each room to divide the rooms. 

Bedroom 1: I found this dragon print paper a while ago and luckily I even found where I'd stashed it. haa! For variety, I'm going to add pieces of trim around the ceiling painted a light blue to match the paper. (Found that in the stash, too, and the color happened to match!)  I put up simple lace valances for now, but will make long pleated curtains on the sides once I decide on the fabric since this room seems to need fancier curtains. I have a padded bed that will fit in front of the windows. It was handmade of foam core that I found among some sale items. I took it apart so I could remake it to match. More on that once I work on it. I really like how this room turned out so far.


Bedroom 2: While the house isn't creepy, I still want to use Halloween decorations and decor here and there. I really liked this scrapbook paper and still want to add some weird circus sideshow art and circus zombies as a theme for the girl's room. Kind of a Wednesday Addams  girl, I think. ha! Maybe I'll dress a half-scale doll or some kind of figure with that idea in mind. That's a thought... The third floor bedroom with the stars theme will be a boy's room, which will be a first as I always seem to do girl rooms. 


Well, that's it for now. I'll have more photos once I get other things finished! 

NOTE: Ooh, I just bought several pieces of vintage 1920s Tootsietoy half-scale pieces on sale, plus the round windows. Love when I find these at a good price as often they're priced so high and out of reach. So I'll have more to add to the house! 


* Check out this interesting vintage ad and history on Tootsietoy pieces. I got a single metal bed (not shown) and the chest/dresser above which I hope will work in the girl's bedroom. I'll probably do some sprucing up since they're painted anyway. It's fun mixing the vintage items in with other stuff. That gold table may work in the dining room. We'll see. Fun stuff!

Thanks again for visiting! I'm also planning a short Halloween in Miniature event and may do more photo Halloween posts next month so keep that in mind! Stop back soon! 


September 15, 2022

The Latest Fairfield #Dollhouse Updates #miniatures


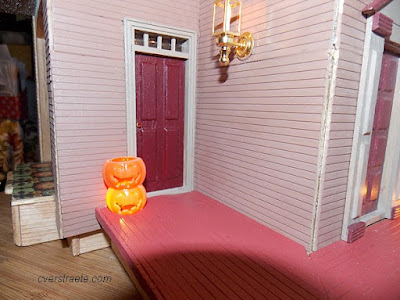
For fun: testing out the lights for pumpkins on the porch. Photos: (c) C. Verstraete (Click photos for full size.) * Added stained glass info and photos in middle.

Yes! There is real progress on the half-scale Fairfield dollhouse! I still remember taking this out of the box - twice  - and putting it back. Never really thought I'd get to this point. I did almost give up on this house a few times but I liked the style and wanted to do it. I'm mostly glad now that I didn't quit! 

I've been steadily working on finishing walls and trim, though I did put it aside sometimes when I get aggravated with the endless (it seems) trimming, but there is progress now. Yay!

One of those I'm-gonna-quit-moments - the light trauma: I originally had a light on that left wall next to the door below. Then I shorted it out (along with my oldest big transformer). Luckily the other light still worked so I put it on the right wall. Then I realized the floor light was too close to the edge as I forgot I needed to fit the porch post in so I had to move that over...  Sigh.


(Another view. I still have to finish the corner trimming and add the window alcove on the left for the kitchen, which is all done. Just wanted to make sure everything was finished in the kitchen first as it won't be as easy to reach in then.)

Exterior: To start - the front porch above. I decided to do a contrasting color that I also used on the top of the tower below to add in another tone. I do like it! Besides this being a paint sample from Target that I came across; real house paint with a nice, smooth texture. The other colors are regular acrylic paint - the siding is Cocoa Bean; the side of the door and all inner windows is Country Tan. The darker doors are Black Cherry while the front door and the other trim (round windows and all window exterior frames) are Rookwood Red. Still deciding on the rails though it'll likely be two-toned with accent colors though I keep leaning toward a wrought-iron style fencing if I can find some cheap enough. Or I might use the railing I had from the Van Buren house that I didn't use and fancy it up. We'll see. 

Also finished adding the brick paper to this side of the exterior walls next to the tower. The lower level exterior is sided. I'm thinking of doing a reddish-pebbled tile paper for the top porch floor here. We'll see. Yes,  I put plastic clear spider web stickers in the round windows for something different. The tower will also have black accent trim.


For fun, I decided to make stained glass for the three top attic windows. While the bottom round part on the stained glass won't show once it's in, the funny thing is I'd originally used a pretty peach color. Yikes! When I looked at it again, I had to change the color as it looked like a big butt! haaa! The gold outlines are a sticker.

At first, I wasn't sure which side to put to the inside, but solved that problem as I found I had enough pieces to add the gold outline to the other side as well.


* Added - an FYI:  Emily (who has a great Fairfield and half-scale house blog, and also does cross-stich designs) asked about the stickers and it didn't dawn on me to share a before pic. They are scrapbook stickers, which often come out at Christmas (or used to). They come in silver, gold, shapes, lines, and designed lines. Not sure if the window style are around anymore, though. The straight lines (not shown) could be used to outline too though it would be more work. I figured the floral shapes could be used alone and filled in with stained glass paint, too. Will try that at some point.


First Floor:

About all that trimming... I finally got all the assorted corner, floor and ceiling moldings done in the kitchen. It was a trial fitting my hand in the hall past the stairs to trim the ceiling by the front door (not shown here; but if you're doing this house, trim the ceiling before installation) but I managed.  It's a royal pain to do all that cutting to trim all these corners, walls, etc. but I admit it gives a nice finished effect when done.


The parlor is to the left through the front hall doorway. Here's my favorite room, the parlor below, with the front hall papered.  I liked the "wild" look of the large botanical print scrapbook paper for something different.


Here's the front hall all trimmed. 


I'm fighting a sudden cold/coughing (hope it's not Covid) so I wanted to get a few photos up for now. I'll put some more room photos up next week. 

The second floor - hall and bathroom, plus the two bedrooms  - are done except for ceiling trim which will be added when I attach the third floor and ceiling. I have to paper that first and see if there's any hard-to-reach spots to trim. I'm really looking forward to start doing some picture hanging, more curtains and decorating but I want to get all the structural things done first. 

I do want to make one room on the third floor an attic room and maybe a reading nook. Then there'll be another bedroom using this blue star fabric (ignore the angels as I don't think they'll work) and a Cassidy Creations campaign bed set painted to match that I bought a looong time ago. I think I have some kind of blue star scrapbook paper around too for part of the walls though the side walls are brick paper like the outside and the ceilings might be wood like the attic. Not sure yet. I also have a cool blue/white round bead with star cutouts that I always thought would make a nice ceiling light cover. I also plan on putting several of those fun mini dinosaur skeletons  in here. 


I still have to put in the windows and figure out curtains for the second floor bedroom also, so lots of planning yet. I then have quite a few kits to make as I was saving them to do. So... that's it for now!

See you next time. Thanks for visiting again!


September 12, 2022

Remembering Queen Elizabeth II #miniatures


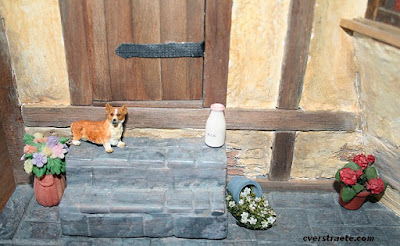
Above: One of the Corgis standing alone. In real life, the queen's last four dogs are supposed to be taken in by Prince Andrew and Sarah Ferguson now. Photos  - (c) C. Verstraete


I see I haven't posted in couple months. I have been busy working on the Fairfield dollhouse and will show some progress later, but first I wanted to share my condolences and deep sadness at the death of England's Queen Elizabeth II. 

I'm a big anglophile and have admired the Queen for years after also visiting the UK twice. Oh, I so wish I was there now to remember her in person! Someday I hope again to be able to go there and visit where she and Prince Philip are buried, as well as see Princess Diana's resting place.

But for now, here again are some of my favorite miniatures from my 1/12th scale Tudor Tea Shoppe in remembrance of Queen Elizabeth II. Here are a few other photos and the full room here. and a newer post here.


Tea setting. Portrait of the Queen and Prince Philip.


I was so glad to have found this tea set with the British Union Jack. I bought a second set also and am thinking of doing a British sitting room.


Queen and Jubilee pillows from LadybirdandPenguin on Etsy.


* Come back in a couple days for dollhouse updates!


July 25, 2022

What Remains True Blog Tour #Romance #Summer Read

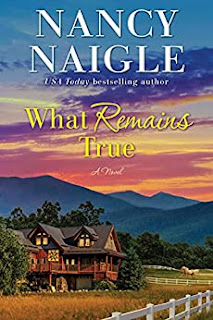
Welcome again to USA Today Bestselling author Nancy Naigle, who's talking about her latest homey, comfy, small town  read,  What Remains True

* Be sure to check out the Q&A, giveaway, and follow the blog tour below for more! 

About the Book: 

Working at a little shop on Main Street in a small town is exactly the break that executive Merry Anna Foster needs following her divorce. She’s made a bet with her ex-husband that she can live on the amount of money she’s giving him in alimony. If she can do it, then Kevin will have to stop complaining and leave her alone. But after three months of this new life, will she even want to leave Antler Creek? 

Adam Locklear, bull rider and owner of the local feed store, is having the best year of his rodeo career. He’s also a bit distracted by the pretty new neighbor living in his old bunkhouse. Then an old girlfriend shows up with a surprise - and leaves five-year-old Zan—the daughter Adam didn’t know he had—in his care.  Does the future hold a life even better than what Merry Anna and Adam had each dreamed of? 

BUY: AmazonGoodreads 

Find Nancy at: Instagram - Twitter  *** Get a free bookmark download and more!

REVIEW: Remember that TV makeup commercial that starts, "Easy, Breezy...?" That's this book. A fun, breezy, summer read you won't put down until the last page. It's easy to get caught up in Merry Anna's world as she adjusts to a new life in a quaint small town, the type of town we'd all like to run away to! You're gonna love seeing how it all turns out! 5 stars! 


** Interview with Nancy Naigle:

What inspired the story?


 The small town of Antler Creek, which I first wrote about in Christmas Angels, had been popping up in my mind over and over again. I loved the characters, and the barn quilt trail, it was just such a great place that I couldn’t resist setting a new story there with new characters and old friends too.


What made you decide to set the book in the rodeo world? How did you research the details? 


I’m a huge rodeo fan, not just bull riding, but all of the events, but bull riders are facing great danger when they get on the back of the big bull. I’ve had first-hand conversations with bull riders, and I was excited to bring that experience to readers who may not know that much about it. In my research about injuries I was surprised that there are a few sports doctors in the sport who used to ride broncs or bulls, and that just possibility made my character even more interesting. The most surprising thing was my personal experience with mutton busting. That’s when kids ride on the back of a sheep. It’s hilarious to watch, and I’d seen it as a spectator hundreds of times, but my stepson actually competed in the mutton busting a few years back and let me tell you…it’s terrifying when it’s your loved one out there! Even on a sheep.


Is there a favorite area for you in a small town you like to write about? Why? 


Small towns have personalities, traditions, and most everyone knows everyone else’s business. I feel like the town itself is another character.


Who/what inspired the main character - and her fun renovating neighbor?  


My characters are never based on people I know, but rather characteristics that make them unique or engaging. Tara, the fun renovating neighbor, is a widow who is very handy with tools and I just love that she’s taken on this huge project. She’s a little old school, so her friendship with our heroine Merry Anna is perfect timing with technology as she tries to shop online for the special lighting and other things she needs for the house. She and Merry Anna have a really lovely friendship.


What is the takeaway you hope to leave readers with? 


 That even when we think we know exactly what we want and are laser-focused on the goal, life has a way of changing our direction. It’s a story of change, adapting and pivoting when things go haywire. It’s also a story of friendship.


Do you plan on another book with any of your main characters - or even the sub-characters? 


Yes! I love this town. There will most definitely be more stories set in Antler Creek. There could even be a wedding coming soon. The cast of characters is growing and there are countless holidays, traditions and stories to tell.


And... what's next?


I have two more books coming out in 2022. They are both on pre-order now.

Mission: Merry Christmas (releases 9/6) is a Christmas novella with a Caribbean setting.

The Wedding Ranch (releases 12/6) is women’s fiction about family, forgiveness and second chances.

Is there a certain other interest or hobby you're drawn to?


 I don’t quilt. I love anything crafty though. The last few years I have been painting barn quilts. Barn quilts can be found all across the nation. There are websites that list barn quilt trails across America and I’ve been on several across the nation.


These aren’t quilts like grandma used to sew, which by the way I love and am so envious of the talent that quilters have! These are quilt-like geometric designs that are drawn on plywood and painted with exterior paint. You affix them to your barn, outbuildings, house, fence or if you’re like me and running out of buildings I’m painting some small 12x12 barn quilts to hang under my mailbox.


I first became interested in them when I wrote the first Antler Creek book, Christmas Angels. Since then, I’ve taken a few classes and painted a bunch of them! It’s such a relaxing craft, and if you mess up, you just paint right over it. I like forgiving art, lol. Readers have been asking me to do a video how-to about it. It’s on my list of to-do’s. So stay tuned.


* Thanks again, Nancy, for visiting and sharing some of your world with us! 


****

* Giveaway: *


What Remains True