Fin
ally! I am making progress even if it doesn't feel like it.(See last post or see other links in left column archives. Click photos for full size.)
A preview: So far, it looks pretty good, doesn't it? There is a goof as when I put the light in I totally forgot about the top piece over the door and the side pillars! It looks fine without it but I like it so luckily, it looks like the insides only have to be sanded down a bit to fit. Bad when you read the directions, then go ahead and forget a piece! I've had to make many adjustments because of that kind of thing.
The stairs aren't in yet as I had to wait for glue to dry and wanted to keep them square. I have to add the top treads yet and the rails, too. All the doors and the stairs are painted Rookwood Red, which I also used on the Fairfield. Thought it added a good contrast.
For some contrast, I decided to put the white brick paper on the outside of the front staircase, which required tracing the shape since the sides came in one piece. Then I had to cut out a paper pattern and then trace that to the brick. But I thought it looked better than just painting it. In case you're wondering, those square holes are for brick pillars and the "iron" rail fences, which all have to be painted yet.
After getting all the lights in last week (oh, don't ask!) I took a break... Getting the top floor in took some doing as was dealing with warping so had to weight (and wait!) Finally did mange to get the top on and the front center tower on... This house requires lots of sanding of tabs that don't want to fit otherwise. Glad we have a giant electric belt sander which has been very handy! Large life-size clamps are also a must!
Here's the back of the roof. Will touch up the brown paint (the brick) and then put some green flock or velvet paper down for "grass" to make a rooftop garden. I'm thinking of putting large planters around the top edge so no one falls off. ha! I found some "Christmasy" fake ferns that are kind of snowy/glittery looking but they're pretty so I hope they work out.
The third floor so far:
I decided later to take out that wall on the left so I have to cover the ceiling slot. The false wall, with a brown door, still has to go on the left side. The larger room will be the bedroom/sitting room where the diner owner lives. Have to add the brown door in the divider wall, too.
Right side room will probably be a kitchen. Since the diner owner/chef lives here maybe I should make a messy kitchen for a change where he "experiments" so he doesn't poison the patrons. ha!
I decided to give this a worn look with old brick and added some color with the turquoise blue paper and curtains. Matched pretty well with the blue tile floor from
Melvin's Miniatures. I also used their black/white tile in the second floor of the
Witch's cottage. All floors are from MM except the first floor. First time I decided to use all tile and not wood in a house but it's a nice change. Have to put in all the trim moldings yet.
Decided instead that this is where the rich widow/building owner lives, Have to paper the right wall yet where I'm putting a fireplace and maybe some shelves. Also have to add the false wall on the left side. Each floor has a different color door to match better, so this floor has a white door. The hanging light was an older kit that I shortened and wrapped with gold cord. I'll get a better photo later. Still have to put in all the trim.
First floor:
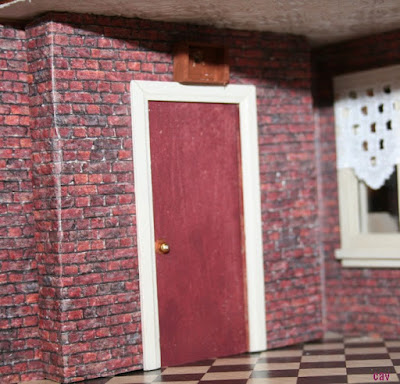
I decided to use the red brick here as it went better with the rest of the room. The diner will be on the right. The hanging lights were made using textured "crystal" globes from LED Christmas lights. Replacement bulbs are cheap (a package of 4 is $1 and change.) You just have to pull the plastic balls off and drill the hole slightly larger if needed. The false wall also has to be added on the left side. I'm happy with how the door and doorknob came out. Cut new trim and used a straight pin, bead, and sequin for the knob. I'll pull the light through the box and have to glue a transparency sign in. (Already printed out.)
So... a preview as the house is all together but trim is not done, etc. Lots more painting yet. Not my favorite thing to do either, ha! But I can put on some sappy Christmas romance movie and just paint! 😁
Next, I'll have to get back to making this year's Half Scale group swap items. Got some done. The theme was Pot Luck, meaning make what you want. Last year's theme was Kitschy. Here's a previous Antiques swap and a previous toy swap, which also was fun. The group members are always very creative!
That's it for the moment.
Thanks for visiting and stay tuned for more updates! I'll be doing a year-end wrap-up, too. And there's the annual Christmas miniatures story re-post coming up!


