A peek at the outside. Porch trim not attached yet. I wish the colors showed up better.
Yay! Been working, slow but sure, so wanted to share a "little" progress on the half-scale Witch's Cottage (made from the Laser Dollhouse Designs' Jasmine Gothic Victorian Cottage. (See last post: 3D printed items. * See first floor done. Click photos for full size.)
The tower is celery green; the trim is blue spruce (dark) green, wedgewood green, light yellow and mustard. The brown is dark burnt umber. I had a hard time with one tower piece warping but it's okay now. I'll add trim on the outside and thin strips painted the dark blue spruce green in between the tower pieces inside.
Porch side piece below. For the porch floor, I decided to do something different and am using a larger tile print with the green and mustard colors. I think it'll look pretty cool. I'm also going to add a thin wood strip piece on top those inner rails so I can set plants on top.
Side porch piece.Inside: the textured brick paper. I liked the darker and worn colors for a change; from Starboc2 on Etsy.
Yay! Got the wall candle light in - after I had to fight and fiddle with it to put one of those bi-pin bulbs in. I like the "old-world" look to this.
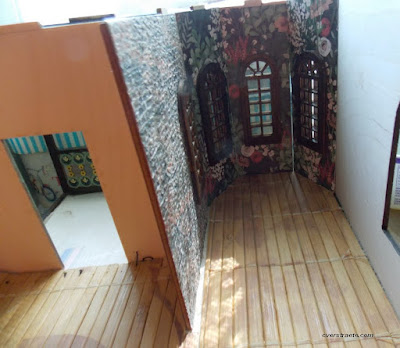
I think the dark floral paper works well here.
The floors aren't in yet. Hint: I decided to use these wood placemats I find at Goodwill. The good thing is they're not real thick so are easily cut with a razor knife. They have a webbing on the back to hold them together once I take the rows of thread out. The tiny holes really don't show once I paint it. It'll be a dark brown. I like to use this or have to put paper on matboard to hide the wires since the lights will be soldered to the floors and ceilings.
(But.... holy cow! I forgot I had that flooring with the black stars! But no worry.... I think it'll look much better with the Gothic furniture in the second-floor bedroom...)
Next step is to get the other electric tape in so I can finish the papering and put the side windows and the trim in. Then I can glue the ceiling and the floors in. Then there's other trim to add.
Here's what the finished kit looks like. (from website.)
And something bright and cheery from the real-life garden. I love these flowers. My favorite color. I'll have to make some in mini. My real-life sunflowers and Mexican sunflowers are also doing well and getting bigger. Luckily we fence it off as we have the resident mama and baby bunny hanging around. 😀
So, that's it for now! It takes a while with all the painting and constructing and fixing problems. But getting there!
Thanks for visiting again! Come back soon for more updates.


