Yes, it's been a little while since the last post, but... I've been kind of busy!
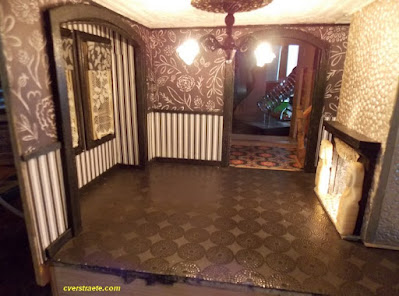
Actually got a few lights in, and in case you wonder what takes so long, well.... it took most of yesterday to figure out this light for the living room/parlor. An old Illinois Hobbycraft kit, it contains quite a few pewter pieces, plastic sconces and a small metal tube. A too small tube I learned after trying to fit in four wires from two lights.
The lamp originally called for three lights, so I omitted one (and glad I did.) Cut the tube as it was too long, then realized it was also too small. And then realized after I got a slightly bigger tube that it would be too low so just scrapped it. Yeah, after all that. haa! I like the final look of it; added a rhinestone on the bottom. I really love this room!
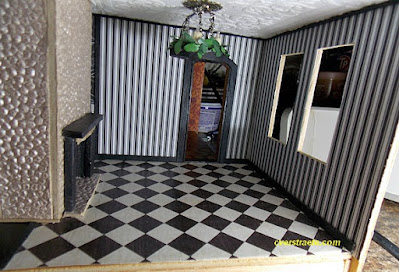
On to the dining room light, with more problems, of course! I got this light with fake candles a while back I think from the Ionos Half Scale Group swap. I painted it black, put chains on, and added the green leaves around it. Then... oh had to match up which wires went together to each of the three candle lights after I struggled to pull them through the ceiling hole. haa! Lucky, hubby is the electronics whiz with his tester and such. But I think it works well with the room, don't you?
Bathroom: For weeks, I had the small wall (which butts up on the left) put aside, all papered and ready and now... of course, I couldn't find it! So had to take another unused piece of wood, cut a new wall and paper it. (Not shown here.) Then I had to paper the inside walls. The back wall had to be glued halfway, put a hole through the paper, attach inside bath wall light, then solder it in back before folding paper over and gluing it.
I have to add another light above the stair opening across the hall and will probably add another light on the ceiling near the window here since the spiral stairs will on the right. I'll add a small corner molding since despite creasing it, the corner paper split. The bumps from the wires won't be as noticeable once everything's in place as you really only get a glimpse of the light through the bathroom barn door.
Kitchen: Yes, ceiling lights are up. I used the metal bead caps and metal findings again like in the other Haunted House as I think they have a vintage look that goes good with the kitchen. (I have to add piece of molding on the top back of the stairs yet.) I decided to put an older piece of ivory textured paper on the ceiling and also used it for the tower ceiling.
More doors and windows are painted and I have to glue in the bay window on right next. Want to get the moldings in before I do that. Also have to add the inner trim on the bay inside edges. I glued a painted piece of cardboard on the inner top which works well.
I know, not many photos and it may not seem like much, but this was a lot of work getting to this point. haa!


