In December 2021, I was also still working here and there on the Van Buren Halloween house at the same time, too. At least I was trying to finish that. So it wasn't until May 12, 2022 that some actual construction of the Fairfield got underway. Now it's almost a full year that the house has been actually underway and...
Ta-dah! For the record: Yesterday, Sunday Feb. 26,2023, I finally finished the exterior of the house! Some small trim still has to be added under the roof eaves and rooms are still being decorated, but the main exterior trim is all done!
After all this time, I admit feeling a little disappointed that it's almost over! haa! Now bear with me.... Before I share the final look, I'm going to cheat and stretch this out a little. So I'll show you a few more additions/changes I made to the inside: (click photos for full size; see past posts archives list and sign up for headline updates in the left column.)
The windowboxes... but all that trim is finished now. I'll show you next time...
Dining Room: I'm adding art yet and am finishing up the dining room table spread shown in the previous post, but I did switch a couple things here. I decided to change the front screen on the bottom of the fireplace and used another ivory-colored resin piece. Thought it went better with the two side pieces I also bought from All Dolled Up TDS at the dollhouse show last year.
I decided to use this carved frame with an eerie building scene as it matched the colors better. I thought it would be cool to get it to glow in the dark, but no matter which paint I tried, (and I have three kinds!) they all glow great in a big blob or in the bottle, but not on the picture. Sigh. Still trying to figure how to get that to work. Anyone know any secrets or a brand/type that'll work in small quantities or just used for outlining, please let me know.
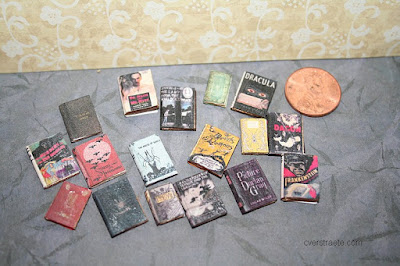
I switched out the single bookcase for the double bookcase model as it fits the wall better. I've added more gold accents since this photo. I love these Gothic furniture kits from SDK Miniatures. The cool spooky books are a Horror Book Covers set from Jupitermoon3 on Etsy. The tea chest on the bottom shelf is part of a downloadable printies Tea caddy set from Zena's Miniatures on Etsy. I should add a bead-knob on the top yet.
Some of the books from the set. Nice front and back printing and clear images.
Living Room: I also switched the art and the fireplace screen in the parlor/living room. I cut a piece of gold metal filigree and attached it to a small wood strip.


.JPG)


