Welcome to the 7th annual A to Z Blog Challenge in April!
Come back daily for more exciting posts and even some giveaways!
Today, I combined the letters U and V for the Upstairs View of the Tudor Dollhouse.
The tour continues. The bakery shop owner lives above the bakery in a simple space, perfect for a bachelor. He doesn't even mind the pink walls so much anymore (thanks to a former girlfriend's decorating touches.) (Click for larger images.)


The living quarters: The walls are covered with textured paper. The ceiling is textured with paint mixed with sand before the wood beam strips were added.

The bed is also made from the Creatology punch-out furniture kit (1/24 scale) from Michael's. The small table by the couch is also a magnet from China (eBay purchase) from my friend, Gigi.
TIP: Make the pieces look more finished by cutting off any protruding tabs. Fill holes and spaces with wood filler and sand. I painted it with a watered-down Brown Umber acrylic paint.
The bed is covered in three layers like a real bed. Glue a thin piece of foam onto cardboard cut to fit the bed. Cover that with one fabric pattern, folding fabric over and gluing to underside of cardboard for a mattress. Cut and fit a second fabric to top of bed and overhanging sides for a bedspread. Glue under small hems for a neat finish. Cut a fake sheet by gluing a piece of fabric to underside of top bedspread, then turn over and glue to top of bedspread.
I made the couch using the pattern in D. Anne Ruff 's older 1/24 scale furniture pattern kit. The small club chair is one of those packaged erasers found at Michael's. Measure your fabric and glue to cover the back and seat of chair. Add smaller size pony beads on bottom for feet.
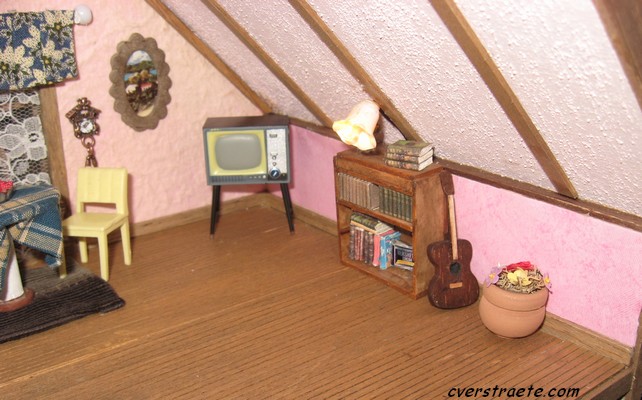
Right side: Simple bookcase, kit from SDK Miniatures. The vintage TV is a magnet from China (from eBay.) The guitar was one of the swap gifts from the annual Half Scale Yahoo group swap. (You can get a similar kit at my other favorite kit shop, Mini-Etchers.)

I added a beam across the top and used a metal mesh bead as a lamp shade for the ceiling light. I had to be a little creative since I hadn't planned the lighting. The sides are covered in a plain pink paper so I could peel it up to reattach the side light and then cover it again.
The window valance is made by pleating a piece of fabric, folding and gluing it so one end is pleated over the next. It's glued to a wood strip with small pony beads at the ends.
The picture frames are painted chipboard pieces. The wall clock is a small charm.
I wanted the room to have a simple, but homey feel. Nothing too fancy, just something clean and neat that the bakery owner would feel comfortable in. It's a simple house, but still fun to decorate.
The table was made by gluing a small round piece of wood to a dowel rod and painted. That was glued to a small flat clay piece for a base. The chairs are vintage plastic dollhouse pieces.
I hope you enjoyed the tour!
I hope you enjoyed the tour!