August 17, 2018

County Fair Miniatures - What is that??

Yes I'm still alive out here. ha! And... I have been working on miniatures!

It's County Fair Time, so Something New: 

What in the world is that thing you ask???? Well....


The special category project this year was a miniature scene up to 18" square based on a nursery rhyme with sheep as the fair theme is "See Ewe at the Fair!"

So... here I thought people would pick Little Bo Peep, right? Well... one of the six entries did. The three top entries all picked Baa Baa Black Sheep! haa! The needle-felted sheep below got first place. A scene with a farmer and a stuffed sheep figure took third. I got second place.


I wanted to do some plays on words so I created Baa Baa's Wool Emporium. (The sign on the back wall at right explains my "sheep" creature. ha!


The fun was coming up with the puns on the signs and making the "ugly" sheep. The sheep is made of paper clay and toothpicks with some fake hair. Kind of looks like part dog and something else, right? haa!

The room is made of the 1/2" thick foam core board, which I really like as it doesn't warp! It's covered in lightweight Spackle wall compound tinted with acrylic paint. The floor is painted and cut from a bamboo/wood strip table mat. Love how this wood worked as it was easy to cut and once you peel off the cloth back, it has tape and a mesh so it holds together! (Ignore the junk outside the door!)


Front/back outside wall entrance


I made all the accessories. The neat little pair of clippers on the cutting pen are made from painted Crayola Model Magic. The end and top are made from aluminum tape. The cord was cut off a miniature electric bulb. I had fun with this, trying to think up something different. The wood wool bins are made from a wood bead (by the front door, not shown) and a curved thread spool.

My other new project was finishing my Witch's Potions Scene, based on this fantastic art. (See the previous post on the picture and background.) I added the cat in since this photo was taken. (I'll take another photo once I bring it back home.)  I still have to work on the doll though I may just leave this as it is. It's in a book box which is fun as I can simply close it like a book, if needed. It got first place in the collage category in Cultural Arts.


The background is painted bamboo from a place mat. The round arch is painted paper clay. And now I see that I have to cut down that left side wood strip a little. The hat is handmade as is the felted mouse cut-out hanging there. The green face is painted Model Magic clay. I used one of those Sculpey push molds and added ears and fake hair. 

I also entered my half scale Herbal Witch's Cottage in the miniature house category. I took out the front tree for now since I didn't want to light it. I also have a small horse in front. (See website photo.) It also got a first place. 


Big surprise was I forget how literal the judges can be. I fretted over this plant and didn't think of the poppy-looking plant not fitting. I was looking at the colors for the Artificial flower arrangements, fall, category. It didn't place as they considered the poppy a spring plant. I'll remember that for next time.


The other surprise was my entry of small flowers for Artificial, hand-made flowers. I always enter some mini plants in this category. This year's got a first place - and  a Reserve Grand Champion ribbon!


July 18, 2018

Upcoming #Halloween Project

It's been awhile since I posted, I see. Not that I haven't been busy working on different things. I'll likely have various posts and projects to share soon as the fair is getting close!

Recently, Dana on the MiniDollList came up with a theme for the next miniature doll project on the list - a steampunk Halloween witch scene based on an absolutely fantastic picture!  Basing a project on a picture or photo is so much fun to do! 

I love this image! I looked it up and found the artwork is formally called "Ezlynn the Industrial Witch" by Bobbie Berendson. (As there are buttons to share the work on Pinterest and social media, I can share the image here.)


Cool details in this. I'm building my scene in a book box and am using miniature jars, plus crystal beads to put on the shelves. I have an interesting gold pot, I think it was an incense burner, to use for the cauldron. I had saved it as I loved the legs with faces!

The fun of replicating a scene is that you can't do it exactly, but you try to get close and put your own style on it. I decided to use a painted bamboo mat for the back, hard to cut but I managed to cut the hole in. There'll be a rust-colored paper for the background.  I'm lining the hole with a paper clay ring that I'll paint. I'm on the third try until I get the lines carved how I want!

I finally got the clay ring to fit and decided to fill in the top portion with clay, too. I'll take a photo once I get the painting the way i want.

Here are some of the items I'm assembling so far! I'll share other progress as I go along. I'm going to work on the shelving next and assembling the doll and figuring out the clothes.

Some of the bottles/jars:


The book box. I removed the lining inside and replaced with bamboo and wood strips.


  The artist also has a coloring book  with assorted witchy images - Madam Mezmerelda's Dark Steampunk Coloring Book: Madam Mezmerelda's Digest of the Mad. the Mystic, & the Macabre.
    Check out her Etsy shop with the book and art prints.

April 28, 2018

Spring '18 Dollhouse Shows!

Wow didn't realize it's been awhile since I posted here.  Doesn't mean I haven't been working in miniature - of course I have! But I've also been busy writing and such, with a new Lizzie Borden, Zombie Hunter book out and book two also! (See website for details and cool covers!)

This blog, though, is where I talk and share MINIS! So, here's a look at a few things I found at the Spring Chicago-area shows (in Schaumburg, IL) and a few things I saw (and couldn't buy. ha!) (Click to see images full size.)

Love these kits from SDK Miniatures. I've been saving her Gothic items for my half scale Haunted House I plan to do. So, when I saw these online I had to have them! I didn't realize she'd be at The Miniature Show, so I saved myself some shipping! Aren't they great? The center kit is a half scale ivy kit.


I also found this cute Halloween set and decorated tree, both from Cindy's Minis. I had bout a chair/couch set and a small skirted table with parson's chairs from her before online.


An interesting set of iridescent "glass?" blocks I found at the Three Blind Mice Show. I got two packages as I thought they could be some kind of window or bath decoration when I do my half scale sea captain and mermaid house. Also found some plain frames and this pretty decorated frame, plus some other metal minis to paint from Mesh Miniatures. I want to use the frames for the spooky Halloween face pictures (that change from plain face to scary face.)


Yes I bought some other things I dosn't need to take photos of - a wood counter, some light sconces and glass chimneys, lots of "small"things. 

I did  find the NAME Day 2015 Window Shopping Kit that looked interesting to try, so I got one. Here are a few photos from an Omaha club's finished kits.   Here's a photo of an unfinished kit. (I got it for $10.) Now to decide how to finish it: Raggedy Ann or Halloween items? Hmmm.....

Now for some things at The Miniature Show that I didn't buy... Care to guess prices? ha!
Handmade leather vintage prams and bicycles.  I didn't write down prices but the prams are in the $300 range - bikes are in the $200 range.


 These are gorgeous hand-painted miniature oil paintings. 


I can't fault any prices on artwork. Joannes Landemann's amazing mini reproductions of 17th century Dutch masters were also on hand (which are in the $1,000 and up range. You have to see these to appreciate the work - see a selection on Pinterest.

Very nice handmade miniature leather chairs. ($365)


 Cool Steampunk-decoraated Tardis Box (Dr. Who)


Handmade dress and jacket outfits. 


Nice shabby furniture assortment.


I couldn't resist getting this tiny sailed ship for my sea captain's mantle.


So just a small selection of things I saw or bought. Good show! Always have fun there.

December 30, 2017

Happy New Year! Christmas Mini Gifts

Happy New Year (almost!) Figured I'd share a few of the mini gifts I got and a few things I made recently.

I made the tray for my friend, Gigi. The cake is Model Magic clay with a Christmas button on top. The cookies are also the same clay with fruit cane slices on top. The hot chocolate is brown/burnt umber paint mixed with gloss Mod Podge, topped with dimensional paint for the whipped cream. The sucker is one of those metal paper prong holders. I painted lace for the handles. I really enjoyed making this so want to try doing one for myself. 


I got a big kick (no pun intended) out of making these! Yeah, it's stuff like this that makes minis so fun! I made the shoeboxes. The shoes are... buttons! Aren't they cute???


I've been working on a half scale Tudor house, it's only 8" tall and has two rooms. I bought it half finished at the last dollhouse show. I'm turning it into an herbal witch's cottage. It'll fit in a small glass case I have so I'll be making a garden and plants, too. I also had an idea to later make two other small houses to go with it on a cobblestone road. I love those Tudor street scenes and much prefer half scale to quarter scale. So that's another idea to work on!  (Like I needed more? haa!) I'll do another post soon showing the house when I finish a couple other things on it.

So here's the table that'll go by the front window (2" long) and the potion cabinet (2 1/2" high). The table is from MiniEtchers. I glued a sparkly cloth on top. The jars are all made from beads.

I also made these two fireplaces. The left one is made from wood and paper clay. The right one was a railroad portal made of resin. I added the the wood back and a small base. Then I added on the top with clay and the wood mantel.


* * * 
A few things I got for Christmas. These cool gates and fences are from Lemax. They hook together and light up. They'll go with my future half scale witch's cottage


These are Israel souvenirs my friend found in an antique shop. I'm going to put them in my mini world museum once I do that project. 


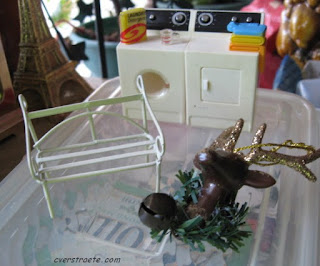
Half scale magnets, bench and a deer ornament 
that'll make a neat wall decoration in 1" scale. She also gave me a string of smaller street post lights (battery operated). 


Half scale magnets. I've never seen the bathtub or the ironing board.


So, stuff for future projects! What are you working on? What minis did you get for Christmas? 

December 11, 2017

Artisans in Miniature Christmas-Winter Issue!


The AIM Christmas - Winter issue is now available.
Download it here at Scribd (you'll need to have a free account to download - or view online)

December 07, 2017

2017 Dollhouse Miniatures Year in Review!


It's my birthday, so what better way to celebrate than sharing some minis I've made!

For fun, I wanted to share my Miniatures Year in Review, a look at some of the projects I finished - and the ones I started, and hoped to finish. 

Looking back, I had an ambitious list, which I barely touched. But you know how it is. Big ideas and then you change your mind on what to work on. Here's the 2016 Miniatures Year in Review.

The fun is, you forget what you did after awhile. (At least I do.) This is a nice way to see what you I accomplished. (Click pictures to see full size images.)


July - August 

I did very well at the county fair in August. My beige mums got a blue ribbon, as did the decorated perfume box I made. I was really happy with how the flowers came out.


My completed Halloween stall got a grand champion in the arts department at the county fair. 


I also made this shadowbox. I wanted to finally try making one. It also got a blue ribbon at the fair. These were some of my favorite mini dresses, bags, hats and shoes I made. 


October

I did get a few things done for my favorite mini holiday. I made more flowers and mums in October.


Dressed Skeletons:

Something I tried. I usually don't paint the plastic skeletons (from Dollar Tree), but after looking at some online, I decided to try it. It does make a difference.

TIPS: 
Here's a look at the progression. Left to right: Unfinished, half painted with white acrylic, fully painted and finished. The last skeleton also has some gray  acrylic paint brushed on for accent. 

NOTE: If you want to pose the skeletons, heat with a hair dryer for a couple minutes, then carefully bend the arms or limbs so they'll sit or hold something.


Here's a couple I've been working on. The beige silk dress needs some buttons yet and finishing touches. Her eyes are small balls of Model Magic Clay. Paint the sockets black for accent. Glue eyeballs in socket. Dot toothpick in acrylic paint for iris and dot on ball of clay. Dot black on eye paint for center of eye. Gluing the eyeballs in kind of cockeyed gives the figure a funny look, I thought. Coat lightly with Modge Podge Gloss or water-based varnish. I lightly painted in eyebrows and lips. 

I still have to wig the other skellie and put shoes on her. These two likely will be customers in the Horror/Haunted Mini Bookstore I'll eventually work on, so I have to bend their arms and give them books to hold. 
Books & Records:


I've printed out some books and started folding them. Since I have so many to do (hundreds? I hesitate to guess!), the easiest way is to fold the covers over pieces of mat board and cut to size. Paint edges white, then glue on cover. So that's something else I started. That and continuing to fold mini record albums. Both of them are addicting, especially when you see the pile growing. There's something about seeing a large number of the same things, isn't there? 


Halloween Porch:


I also decided to start decorating a miniature porch I've had for a while. I didn't finish it until November, but I enjoyed working on it. I still have to add a dressed skeleton in the chair and am putting some other vines and flowers up. I might add a door wreath yet, too. I think the door needs something else. It's hard to tell, but the window has a fabric spiderweb covering it. See photo from back below .  


The "dog" is a crazy Hell Hound or something I painted at a convention. Perfect scary "dog." ha!


I didn't want to leave the back unfinished, so I covered it with scrapbook paper, added trim and glued on some apothecary ads and a curtain. The image in front is a ghost lady playing the piano. I painted her dress in glow-in-the-dark glitter though it doesn't show up as much as it does in the bottle. Too bad.


November:


 Other projects done or underway: added gold sequins and a string of crystal balls to a half-scale Christmas tree I got in a swap last year. 


I got this cool half scale Tudor house at the bargain table at the last show. It's made of mat board or some kind of board and is pretty sturdy. It fits in a glass case I have so I'm decorating it as an herbal witch's house. I painted the roof (made of cut tape) and painted the back edges brown. I added sand paint to the ceilings inside. I put three wood strips on the first floor ceiling. It's a little warped so the sticks aren't totally flat, but it'll work. 

I'll add a separate blog post as I progress and show more that I get done. I have to make a door and put acrylic in the windows, plus add curtains, too. It will probably have a "magical" garden with some "punny" plants I got in a past Half Scale group swap. 

So, I did work on more than I thought! What're you working on?

Have a great and blessed Christmas, and a fantastic New Year!